Picture before changes:

After:

- Open original image in Photoshop.
- Go to Filter > Blur > Surface Blur.
- Choose Image > Adjustments > Gradient Map

- Image > Adjustments > Levels.

- Image > Adjustments > Curves.

- Image > Adjustments > Photo Filter.

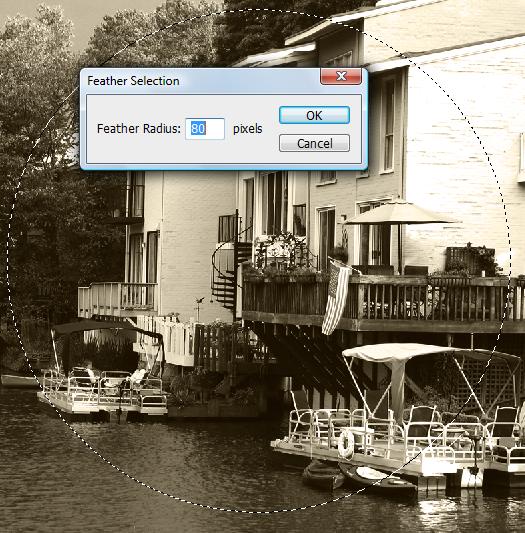
- Find the center of composition and create round selection using Elliptical Marquee Tool.
- Go to Select > Modify Feature Selection (80-100)
- Select > Inverse.
- Choose Filter > Blur > Lens Blur.

- Filter > Noise > Add Noise

- Duplicate background layer.
- Apply Grain Filter to it.

- Apply Overlay Blending Mode and Opacity 50% to it.

Find any scratches texture, I used texture from here
.jpg)
- Choose Image > Adjustments > Levels.
- Move central marker to right a little bit.
.jpg)
- Apply Soft Light Blending Mode and Opacity 80% to this layer.

- Merge both layers.
- Add Inner Glow effect to created layer.

- Place in the bottom layers two old paper texture layers.
- Dark paper should be in the lowermost layer


- Add Layer masks to the picture layer and light paper texture layer.
- Create ragged edges using round brush in the Layer Mask.
- Apply shadow layer style effect to the light paper texture layer.


And here is result! Click to larger view.
No comments:
Post a Comment